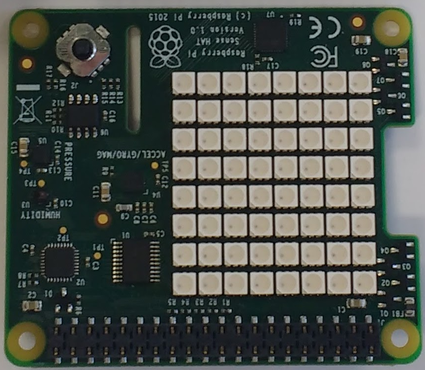
In a previous post I gave an introduction to the Node-RED connector for IoT Central and because I have been asked to provide more examples with a real device, I have decided to use a Raspberry PI (in my case Pi 2 Model B) with Sense HAT, that allows your Raspberry Pi to sense the world around it. The Sense HAT is an add-on board for Raspberry Pi comprising of a 8×8 RGB LED matrix, a five-button joystick and the following sensors: Gyroscope, Accelerometer, Magnetometer, Temperature, Barometric pressure and Humidity. We will use Sense HAT to get temperature, humidity, pression and in a future post the LED matrix.
If you have never used it, you can find a getting started at the official Raspberry Pi web site.
If you haven’t done before you can update your Node-RED installation and then you can launch node-RED, as usual, from the browser. In my case I’m connected using VNC to Raspberry and I can browse on 127.0.0.1:1888.
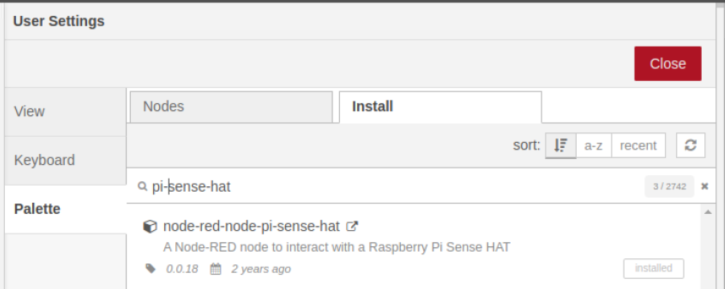
Install the Sense HAT node and the Connector for IoT Central, as for any node. Go to settings, on the top-right menu, palette, install and search for node-red-node-pi-sense-hat and node-red-contrib-azure-iot-central

Our Node-RED environment is ready to get started, but before, we have to create an Azure IoT Central Application and a template for the device data. In this first sample we only need to send telemetry (temperature, humidity and pressure) from the Raspberry to IoT Central. Go to https://apps.azureiotcentral.com/ and create a Custom App, you can use a free plan or a S1 (first 2 devices are free to use anyway!), choose your Azure Subscription (you need one) and a location and you are good to go.

In less then a minute you can enter your brand new application, now go in the left menu under the App Settings and click on Device templates and press the “+” sign to add a new one. We now want to describe a simple template that describe the json message that the Raspberry with the “HAT” will send to our App. In our case the json will have a single field temperature, and other two for humidity and pressure. So now press the IoT device for Create a custom device template.

We can give it a name, like RaspberryWithSenseHat :-), but NOT flag “Gateway device” and press create. We can now create the actual template, or better the capability model. For the capability model you have to add an interface first, press “+” and custom. Now press the “+ Add capability” button, and here finally is where you describe the fields passed. Fill the form as below, it’s important that the name matches the field as it will found in the json file.

Now add other two capabilities for humidity and pressure.
Basically we expect that Raspberry Pi and Sense HAT send a Json file as the following one:
{"temperature":33.04,"humidity":61.6,"pressure":1002.37}Now you can save and publish the template and if you go back to the original Device templates list you can find the one created.
Eventually you can import a template already created, so if you want you can download mine from here.
Now on left menu, go to device, press + to add a new device and in the dialog under Template type, select the one you created, give a name and a device ID (this will be used in Node-RED) and finally put the Simulate this device switch on No.
Now under the Device connection information, write down your Device ID, created just the step before, the ID scope, select as Connect method Shared Access Signature (SAS) and take the Primary Key.

Okay, we are ready to go back. Build a very simple flow like this one
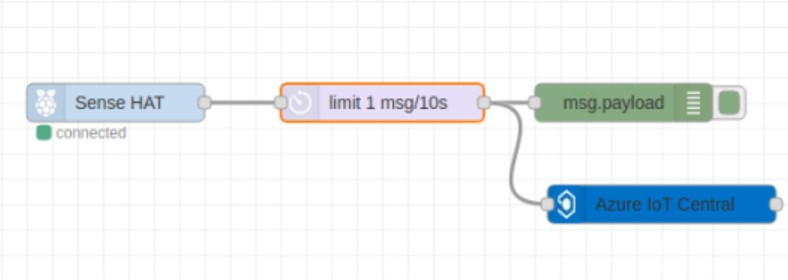
You can download the flow from here and import directly in node-RED.
Double-click on Sense HAT and select ONLY “Environment events” as in the image below:

Set the delay every 10 seconds the message, dropping the intermediates. Of course this step is not actually necessary.
Double-click on the Azure IoT Central connector, select SAS as authentication method and fill with ScopeID, DeviceID and Key.

First look at the debug node panel to see if we get the telemetry as expected, so temperature, humidity and pressure and remember that those names must match the one used in the template definition for Azure IoT Central.

Now go the IoT Central App, under the device you created before you should see the events flow in!

Spending a little more time with IoT Central you can build amazing graphs for your telemetry.

Summary
In this post you have seen how to connect a real device that can run node-RED to IoT Central using the new Node-RED connector for IoT Central and sending telemetry, the connector support MQTT, AMQP and HTTPS for the transport. We have used a very simple scenario using Shared Access Signature (SAS) as authentication method.
I hope it helps.

One thought on “Raspberry with Sense HAT telemetry to IoT Central using Node-RED”